Direction & Contrast of Light
Introduction to Studio Techniques
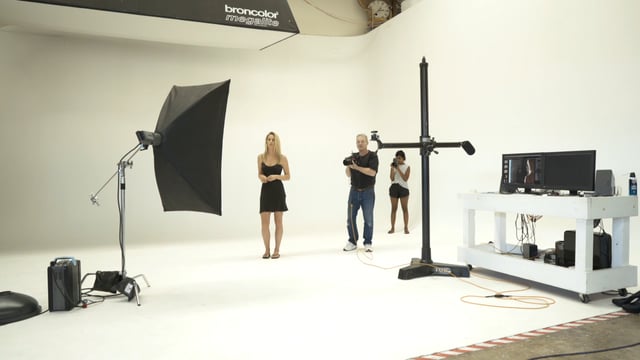
These videos have been put together by Peter to teach you the fundaments of how he sees light, how he understands it, and how he uses it. All his studio lighting is based around these videos.
Model: Teisha Lowry
Camera: Hasselblad H6D-50c
Lens: Hasselblad 100m f2.2
Assistant: Rozanna Nazar
1. Direction of Light
2. Contrasting Light
3. Direction & Contrast of Light
24 comments on “Direction & Contrast of Light”
Great content!
What are the measured dimensions of the octabox that was used in this video?
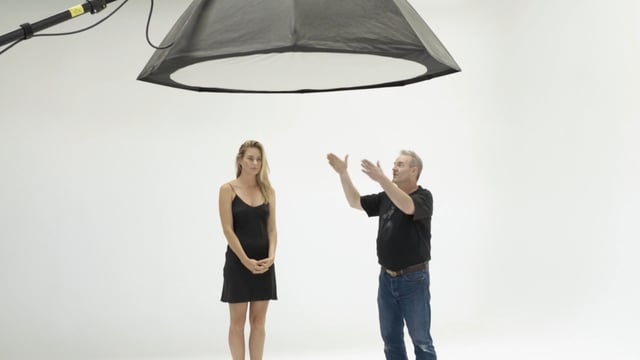
Hey Derrick! This was a 1.5m Octabox. The larger the Octabox, the greater control you have over the fall- off. This can be achieved with any sized Octabox, but the smaller the Octabox, the control area is very small. So the bigger the Octabox, a tiny movement will make a small change – the smaller the Octabox, a tiny movement will make a big change.
Thank you so much Rozanna!
Hi Rozie!
Say I was shooting straight on headshots. What is the main difference between lighting from above vs. having the light in front of the model?
Also, thanks for all your help– I’m loving the content!
Michael
Hi Michael!
If a model is standing directly under the light, it will be very harsh. To get a ‘nice’ shot, her head would need to face the light. I wouldn’t suggest that to be practicl for a headshot, maybe more pracitcal for a fashion shoot. If a model is standing behind the light, it will be more even. This would be more suitable for a headshot.
These 3 videos are not nessercarily lighting set-ups to use (althought they 100% can be), but to teach you how to understand and see light.
Don’t forget to keep trying different things – get the model to take small steps forward and backwards, take a photo and see if you visually like it or not. If you don’t like it, keep moving her. If you like it, shoot it 🙂 Every tiny step you or the model takes, will change the contract of the light.
I attempted the overhead light setup Peter used here with less exciting results. A large 86 inch umbrella with a diffusion sock placed over it was aimed down to the ground. The model was approx 18 inches behind the light (with her movements) and it was approx 18 inches above her head. White floor and white wall behind the model. My final result was dark eyes on everything other than when the models head was facing up, much like you would see with noon day sun. This makes sense to me but not what I was expecting after seeing this tutorial. I was able to pull the lights out more in PS but of course that’s not the goal. Any suggestions, tips, hints on what the problem is with my setup?
(Was able to pull the eyes out more in photoshop, not the lights out more)
I’ve been doing this for more than 10 years with no problems, can you please email me some images peter@koukei.com.au
Peter, I have a small home studio and my 100 octa is about as large as I can fit in the studio. Is this still suitable (just more sensitive)?
Yeah definitely still suitable, but if all your walls are white you may struggle to get the contrast of light.
Hi Paul,
Does this need to be an Octabox overhead, because the characteristics of the octabox cause the effects shown or could this be achieved with a large soft box?
Thank you and I’ve learned more in those three videos than I ever previously knew…
Hi Simon, doesn’t need to be an octabox, it will work with a large softbox and is the same with any light at all, it’s just that the larger the light more subtle the movements will be
Hi Peter,
great tutorials!
Can I ask,if I have the light behind me as I shoot the model, who is facing me..(direction of light) will it also be a still soft?
Contrast of light is not relevant here?
Could one use other lights to complement the soft light descibed here?
thanks Peter
Mark.
Hi Mark, thanks heaps, glad you are enjoying them.
Yes the it would still be even, if it is soft or hard depends on the type of light you use.
Yes contrast of light of light is still relevant, the further the light is infront the more even and less contrast.
You’d be best getting in a studio and having a play with other lights to see if they will complement the light because every light and every diffuser will give a different effect
Hi Peter,
Can you advise why the 30cm is critical for the positioning of the model around the edge of your lighting overhead.
Is it because it’s an equal distance from the centre of the light to the edge?.
Thanks Tony
Hi Tony, the 30cm is just so I have a visual of how far to keep away to keep her from the light so that I have the same exposure the whole way around 🙂
Hey Peter and Bec! Hope all is well! I wasn’t sure where to ask this question so I will post it here and try my luck. Is it possible for Peter to go over which lighting set-up(s) will work best for different face shapes? IE: (Rembrant, Short Lighting, broad lighting, Butterfly lighting, etc.) Specifically, if you are photographing civilians, non-models or normal people with all sorts of body types? I’m a portrait photographer and work with models on my own dime but I’m being commissioned by regular people to photograph them and want to make sure I light them in the most flattering way. Thanks heaps! Best, Ted
Hi Ted, I know clamshell will usually make a round face look rounder, but I dont really have a set way of thinking of what I’m going to do with each person, I set up my lighting and adjust it til it looks right on their face 🙂
Hi Peter.
New subscriber here. Promised myself i would put some structure around my learnings here and not randomly select the modules ( just yet ;-).
I have a bit of experience in my home set-up….but starting here on the Lighting chapter…..Oh Wow. Shots I’ve tried to do ( and got by with a lot of faffing about and dodge and burn ( Big Style) ) …. just came alive in these 3 videos.
The fun part was then going away to play with it.
I urge anyone watching, just have a go, play, cock it up…work it through…. after it will have answered a load of questions you have had.
Really enjoying the teaching style too. “Goal posts”, “Planets”,” Rocks on the Beach”
Kudos Peter and the team (Thumbs up emoji goes here)
Thanks Ron
Hi Peter,
Is that softbox the Bowens 1.5m Octa?
Thanks
Yes it is
Just thought I should rewatch this video. Reinforces the concepts of Direction & Contrast . Super helpful! Thanks again
Starting off 2026 why wait to learn and play thank you