
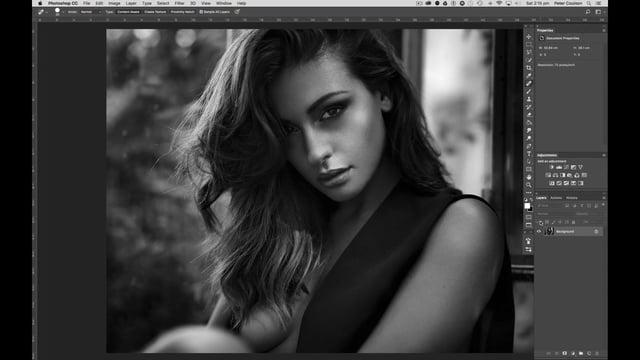
Tess (Milan) Retouch 1
This is a start to finish retouch of Tess, from an editorial shoot in Milan 2017.
Camera: Hasselblad H6D-50c
Lens: Hasselblad 100mm 2.2
Shutter speed: 1/500 seconds
Apature: F/3.2
Focal length: 100
Lighting: Milan Natural Light
Model: Tess Perrone
Hair & Make-up: Eleonora G Pellegrini
4 comments on “Tess (Milan) Retouch 1”
Thanks so much, Peter… Love watching you retouch! I’m still working on finding the point when to stop… I tend to go in too close, but I’m getting better (I think). This helped a lot!
less is more 🙂
Peter, I like the tonality you create in your B&Ws, seems to really match my taste.
And just as a tip on PS’s built-in High pass filter – as opposed to a true HP from the film / darkroom days that was basically just a blur of the image negative that would then serve as a “matrix”, Photoshop’s filter is this plus 50 Contrast added to the blur layer (but the old way – using Legacy mode) to sharpen more. So it is incorrect (overcooked) by design and being based on Gaussian blur, it always introduces haloing around the edges.
To get the most out of it though, desaturate first as you showed (can also use Cmd+Shit+U as a shortcut, works only on rasterized layers), then Contrast -50 with Legacy mode turned on (without this step PS’s HP will disregard the edges of the histogram as the filter was introduced in an era of much less computational power and still works the same). Then just run the HP filter as you did.
To get an idea of the difference between the current vs. legacy contrast adjustment, try running it over a smooth gradient from 0 – 255 both ways and see how different it behaves.
Cheers!
Thanks I will try it